Ch. 2: Size Selection, Purchase, and "Let the Conversion Begin"!

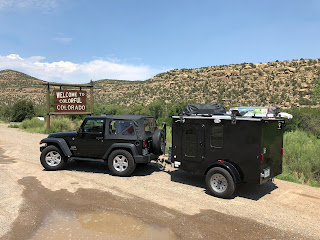
A lot of things to consider when making the size selection for the cargo trailer to be converted. We were trying to keep the camper small because we planned to pull it behind a two door Jeep Wrangler with a towing capacity of 2,000 lbs. and we are intending to use the combination in some moderate off-road adventures (boondocking).
Looking online at other build outs, the sky is the limit. If one had a bigger towing rig and was planning to stay on the paved roads, you could certainly go with a much larger cargo trailer. The teardrop trailer that we rented earlier became the template that we wished to mimic. It was roughly 5' X 8' and just tall enough to sit in.
A quick search of Craigslist lead me to a local trailer lot. They had the target sized galvanized steel trailer for $1,800.00. After a walk around of the trailer on the lot, I asked Paul, if certain things could be modified; height of trailer lowered by a foot, supports (studs used to make the frame) added to accommodate the doors, windows, vent fan, AC unit, and the axle moved back 6 inches for increased tongue weight. Paul stated that he would contact the manufacturer and get back to me with the adjusted price. These modifications added $400 to the stock trailer bringing the total price to $2,200 plus tax title and licensing. A new purchase is not required. If you had a cargo trailer or wished to find a gem of one used, that would be perfectly fine.
The next move is to order those large items that will require the additional supports (studs). Once the teardrop doors (driver's side and passenger's side), windows, vent fan, and AC unit come in then get a "day light" opening size for your drawings. The day light opening gives the builder a layout of where you want the studs placed to assist with your installation. For instance the doors were 26 inches wide. I used a half inch clearance and drew the studs at 26.5 inches apart - from inside to inside. This only gave .25 of an inch around the doors and windows and after a few tight fits, I would recommend increasing the opening size by at least 1 inch of what is absolutely required; 27 inches would have been much easier on me. Wanting to waterproof and insulate the flooring, we asked that the plywood floor not be caulked to the frame. If you modified a used one, as mentioned earlier, then you could easily add the supports to firmly hold the doors, windows, and other accessories.
After a couple of weeks we got a call that the trailer was ready.

The first thing is to remove the flooring and paint the bottom with waterproof paint. We had a half gallon of red rubber paint leftover from replacing the walls and tile in a bathtub a few weeks earlier. Once painted, we glued Reflectix (foil bubble wrap) on the bottom to assist with waterproofing and insulation. The big box hardware will have the paint. (1 day of work)


Once the floor is back in, target holes can be drilled from the inside to the outside to assist in the placement of the major components. (In the left photo above: Notice the framed out area of supports at the front of the trailer to accommodate the AC unit. The doors and windows frames can also be seen on the sides.) If you are working with a used trailer, once you layout where the components are to go you will need to add some supports to assist in securing. If 1 inch tubing is used in the trailer, then a few well placed 1 inch tubing supports will need to be secured to assist in the firming up of the sides.


Using the target holes as a guide place the frame of the door, window, or vent fan on the outside of the trailer and mark an outline with a wax pencil. Be sure to tape off the area outside the wax pencil so that the jig saw does not scratch the trailer paint. In the left picture above you will notice that the storage under the bed is in place. I will detail that later, but I want you to remember that the door will be adjusted up or down depending on how much under-bed storage you are building in and the thickness of the mattress. We used 2 X 6 inch boards for the framing, but you could use 2 X 4s or 2 X 8s. What you are looking for is a door height that lets you sit on the bed about even with the threshold of the door. If the door is to high then it will be uncomfortable to sit down on the bed as the door frame will bruise your legs. Remember the mattress will crush down as you sit. It is better to have the door a little low than to high.
The doors and windows from Vintage Technologies are high quality and come with trim to make the install very professional. Remember that you want the hinge of the doors to face forward so as the trailer is being towed, an unlatched it will not fly open. For that reason there is a driver's side and a passenger's side door to order. Here is a link for the windows.

We placed the doors about 1.5 inches above the bed frame (or bed storage box). The bed storage box consisted of a 2 X 6 frame with a 0.5 inch plywood top hinged for easy access. More on that in the next post.

Here is the AC unit and vent fan in place with a glimpse of the doors. This goes pretty fast once you get the hang of it. I will call it two days just because you need to go slow and be deliberate in your markings. Mark it with the wax pencil and let the blade of the saw cut right in the middle of wax mark. As you can see, I ran the day light openings a little tight and my major components were somewhat difficult to install. You will do better than me, by adding 1 inch to overall tight fit for a half inch clearance all the way around. The Fantastic Fan vent fan has two directions and three speeds. This unit has an electric up and down, which I like because it is techie looking. The Fan-Tastic company has several models to choose from. One that even closes when rain is detected.

Since I am on the subject of the AC unit I want to show the shelving bracket that was used to support the weight of the unit. The bottom of the bracket against the trailer is bolted through the stud that runs along side of the AC unit. You may need to run a piece of flat metal from one side to the other side of the brackets in order for the weight of the unit to rest on the shelving brackets, as the brackets are a little outside of the width of the AC unit. The black box on the outside is an irrigation box minus the green lid. The white mesh is from a clothes-hamper basket. I know, real high tech stuff here; but it works.
In the next post I will discuss the under bed storage.


Comments
Post a Comment