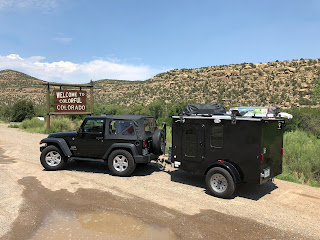
Ch. 3: Bed Frame with Storage.

As you can tell from the picture, we built the bed frame and storage before the doors and windows were installed. The main reason for this was to make sure we were satisfied with the storage space that the 2x6 inch boards gave us, as we were considering 2x8s. We also lived with the trailer on a couple of trips before installing the paneling in the picture below; mainly because we were not sure if we were going with paneling on the sides. The paneling does give the cabin a nice finished look and adds to the insulation value. On the next build we will install the paneling before the bed frame storage; much easier in that order.

Each side of the bed frame is an independent box that is about 2 feet in width and 6.5 feet long made with 2x6 pine boards. The end that you are looking at is open to the kitchen to allow for storage of cooking pans and canned goods. Just on the other side of the power tools there is a 2x6 that blocks off the kitchen storage space from the under-bed storage; notice that the topper above the kitchen storage is firmly screwed in place. All of these dimensions can be adjusted to fit your needs. You may not need 6.5 feet in the bedroom or you may need more; adjust accordingly. Remember that in the future you may want to sell it and some folks would need the leg room, also the queen mattress needs to fit.
In this build out a gap between the two bed frames of 6 inches was made to allow for a motorcycle or bicycle to be loaded from the back and strapped in place without sitting on the bed frames. A 1x6 inch board sits on blocks that are attached to the inside of the bed frames to fill the 6" gap. You could make one big box frame about 5' x 6.5' and have a 2x6 running down the middle to separate the two halves with the but hinges attaching to this center board. This would give you more under bed storage. However, we did not let this gap-space go to waste. We have a 6 foot piece of drain pipe to ride in the gap and use it to store small propane tanks and other very essential camping items. I would say that we have maximized the use of that area, for sure!
https://youtu.be/t1HTUE1PWOc
On top of our frame is a queen sized mattress from IKEA that is about 4 inches thick. When sitting on the mattress it squishes to about 1 inch. You want the placement of the door threshold so that it is even with the squished mattress. This will prevent bruising of the legs as you move from sitting between the laying and standing positions. About the only other consideration for the mattress is that it will bend when you access the under bed storage and that it is comfortable; you don't want to "bottom out" on the plywood. On my side we added another half inch of self inflating air mattress to prevent the dreaded "bottoming out". I am a little heavier than the wife.....
You can cut a large hole in the top of the plywood top for a finger hold to assist with lifting the storage lid or you can add a small handle. We have also added a stick to hold open the storage and a small battery supplied light. I would recommend an LED motion activated light, as I have been known to leave the light on and let the batteries run dead. On securing the boxes to the floor we just used leftover pieces of that metal angle you see in the picture and screwed it in place with short wood screws and washers (1 inch #10s or something like that).
In the next post we will look at the kitchen layout. All this is real easy stuff. Just take your time and have fun with it.

I just met your daughter art teacher at RRHS. I was her substitute earlier in the week. When I showed her my "bolt on" truck camper, she gave me your card. I built it to fit my 6.5 foot bed plus tailgate. I built it because it was fun. Also, I no longer am interested in hauling the 27' 5th wheel that sits in its shed in the orchard. My wife thinks it can become an Air BnB. I'm going to try to sell it so I can start over. Jerry Nehman gnehman@gmail.com
ReplyDelete